Tool Dude – Setup Guide & Server Requirements
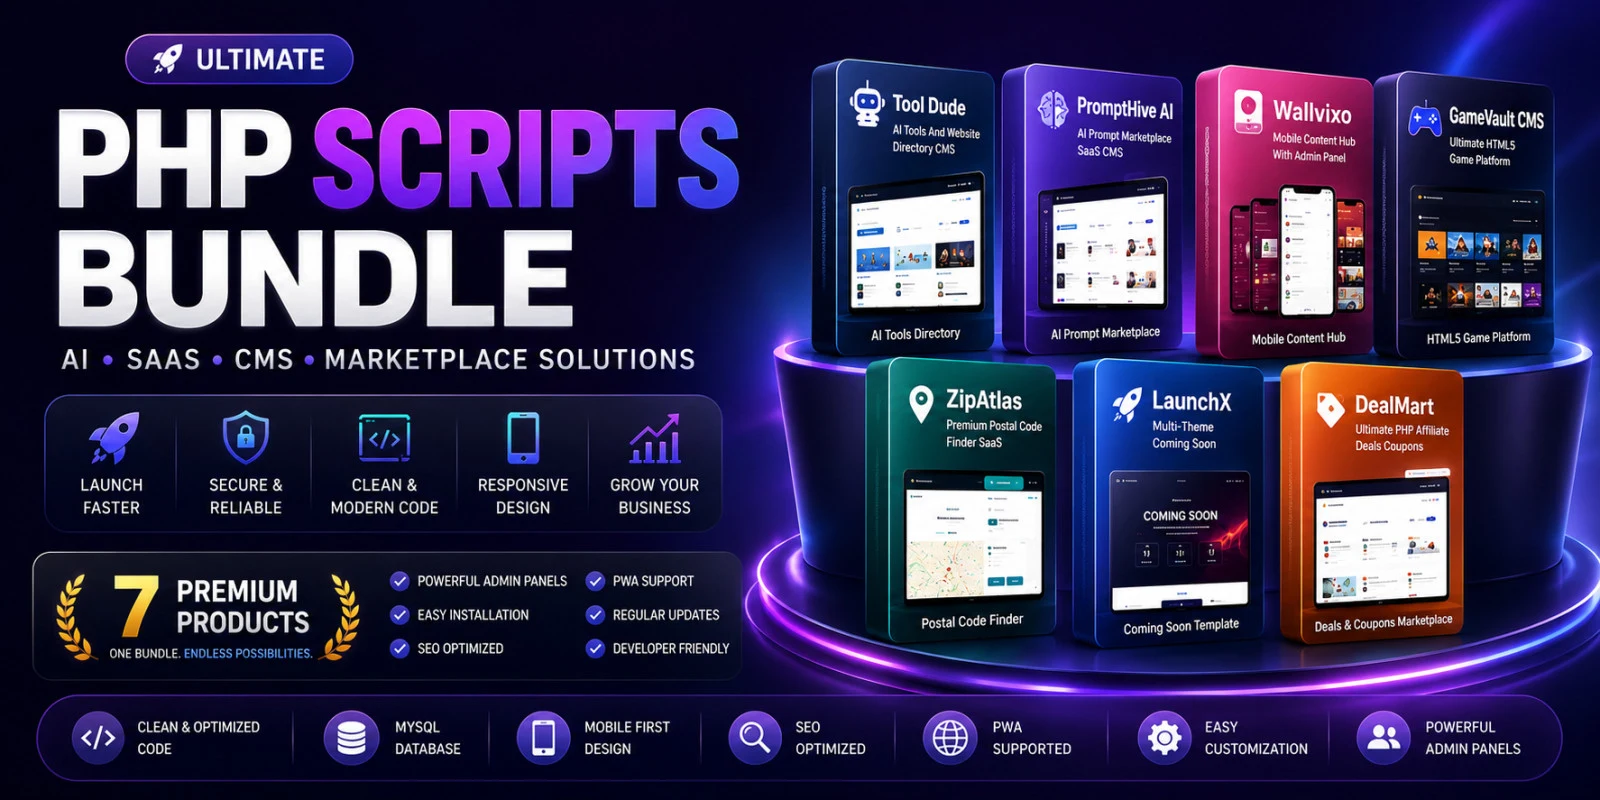
Tool Dude is a self-hosted PHP & MySQL CMS for creating AI tools directories, SaaS listing websites, startup showcases, and general website directories.
No Node.js, Composer, Laravel, or other build tools are required.
---
1. Server Requirements
Before installing Tool Dude, make sure your hosting server meets the following requirements.
Minimum Requirements
- PHP 8.1 or higher
- MySQL 5.7+ OR MariaDB 10.3+
- Apache or compatible web server
- mod_rewrite enabled
- Approximately 50 MB disk space for the core script
- Writable directories for uploads, cache, storage, configuration and backups
Required PHP Extensions
The following PHP extensions are required:
- PDO
- pdo_mysql
- cURL
- OpenSSL
- GD OR Imagick
- Mbstring
- Fileinfo
- Zip
- JSON
Not Required
Tool Dude does NOT require:
- Node.js
- npm
- Composer
- Laravel
- React
- Vue
- Python
- SSH access
- VPS
- Dedicated server
Tool Dude can run on standard shared hosting that supports PHP and MySQL.
---
2. Recommended Hosting Environment
For the best experience, use a hosting provider that supports:
- PHP 8.1+
- MySQL 5.7+ or MariaDB 10.3+
- Apache
- mod_rewrite
- SSL/HTTPS
- PHP file uploads
- Cron Jobs (optional)
- At least 100 MB available storage
HTTPS is strongly recommended, especially when using:
- Google Login
- Facebook Login
- GitHub Login
- SMTP
- PWA features
- Admin authentication
---
3. Before Installation
Before starting the installation, prepare the following:
- Your domain or subdomain
- Hosting account
- MySQL database
- MySQL database username
- MySQL database password
- Database hostname
- FTP/SFTP or File Manager access
- PHP 8.1 or higher
Example:
Domain:
https://example.com/
Installation location:
https://example.com/
Or:
https://example.com/tools/
---
4. Upload the Script
After downloading the Tool Dude package:
- Extract the ZIP package on your computer.
- Open your hosting control panel.
- Open File Manager or connect through FTP/SFTP.
- Navigate to your website's document root.
For example:
/public_html/
- Upload all Tool Dude files to the desired directory.
For a main domain:
/public_html/
For a subfolder:
/public_html/tools/
- Extract the ZIP file if you uploaded the compressed package.
- Make sure the main application files are directly inside the installation directory.
---
5. Create a MySQL Database
Tool Dude requires a MySQL-compatible database.
From your hosting control panel:
- Open MySQL Databases.
- Create a new database.
- Create a database user.
- Assign the database user to the database.
- Give the user all required privileges.
You should have:
Database Name:
your_database
Database Username:
yourdatabaseuser
Database Password:
yourdatabasepassword
Database Host:
localhost
NOTE:
Some hosting providers use a different database hostname.
If your hosting provider gives you a specific database host, use the value provided by your hosting provider instead of "localhost".
---
6. Configure PHP Version
Make sure your website is using PHP 8.1 or higher.
Recommended:
PHP 8.2
PHP 8.3
PHP 8.4
You can usually change the PHP version from:
cPanel
→ MultiPHP Manager
or:
Hosting Control Panel
→ PHP Settings
Make sure all required PHP extensions are enabled.
---
7. Required PHP Extensions
Verify that the following extensions are enabled:
- PDO
- pdo_mysql
- cURL
- OpenSSL
- GD
- Mbstring
- Fileinfo
- Zip
- JSON
If your hosting control panel allows extension management, enable any missing extensions.
If you cannot enable an extension yourself, contact your hosting provider.
---
8. Folder Permissions
Tool Dude requires write access to several directories.
The following directories should normally use:
0775
Required directories:
                /uploads

                /uploads/tools

                /uploads/blog

                /uploads/logos

                /uploads/banners

                /storage

                /cache

                /config

                /backups
Example:
chmod 0775 uploads
chmod 0775 storage
chmod 0775 cache
chmod 0775 config
chmod 0775 backups
Do not use 0777 unless your hosting provider specifically requires it.
After installation, use the most restrictive permissions that still allow the application to work correctly.
---
9. Start the Installation Wizard
Once the files and database are ready, open the installation URL.
Example:
https://example.com/install.php
Or, if installed inside a subfolder:
https://example.com/tools/install.php
The Tool Dude installation wizard will guide you through the setup process.
---
10. Installation Step 1 – Requirements Check
The installer will check your server environment.
It may verify:
- PHP version
- MySQL/MariaDB support
- PHP extensions
- File permissions
- Required directories
- Server configuration
Make sure all required checks pass before continuing.
If a required check fails:
- Read the displayed error.
- Fix the server configuration.
- Refresh the installer.
- Continue only after the required checks pass.
---
11. Installation Step 2 – Permissions Check
The installer checks whether required application directories are writable.
Typical directories include:
/uploads
/uploads/tools
/uploads/blog
/uploads/logos
/uploads/banners
/storage
/cache
/config
/backups
If a directory is not writable:
- Open File Manager.
- Select the directory.
- Open Permissions.
- Set the appropriate write permissions.
- Return to the installer.
- Refresh the page.
---
12. Installation Step 3 – Database Configuration
Enter your MySQL database information.
Example:
Database Host:
localhost
Database Name:
your_database
Database Username:
yourdatabaseuser
Database Password:
yourdatabasepassword
Enter the exact credentials created in your hosting control panel.
Click the database connection/test button if available.
The installer should be able to connect successfully before continuing.
---
13. Installation Step 4 – Database Import
After successfully connecting to the database, the installer will initialize the required database structure.
This may include:
- Tables
- Default configuration
- Categories
- User system
- Tool system
- Blog system
- Reviews
- Favorites
- Comparison
- Advertisement settings
- SEO settings
Allow the installation process to finish.
Do not close or refresh the page while the database installation is running.
---
14. Installation Step 5 – Website Information
Enter your website information.
Typical settings include:
Website Name:
My AI Tools Directory
Website URL:
https://example.com/
Website Description:
Discover and compare the best AI tools and software.
Admin Email:
admin@example.com
Configure these values according to your website.
Make sure the website URL is correct, especially if the script is installed inside a subfolder.
---
15. Installation Step 6 – Create Administrator Account
Create your main administrator account.
Example:
Name:
Administrator
Email:
admin@example.com
Password:
Use a strong unique password.
Use a strong password containing:
- Uppercase letters
- Lowercase letters
- Numbers
- Special characters
Example format:
YourStrongPasswordHere
Do not use the example password above as your actual password.
Keep your administrator credentials secure.
---
16. Installation Step 7 – SMTP Configuration
Configure your SMTP email settings if required.
Typical SMTP settings include:
SMTP Host
SMTP Port
SMTP Username
SMTP Password
Encryption Method
From Email
From Name
Example:
SMTP Host:
smtp.example.com
SMTP Port:
587
Encryption:
TLS
Use the SMTP information provided by your email or hosting provider.
After configuring SMTP, use the test email feature to verify that outgoing emails are working correctly.
---
17. Installation Step 8 – Security Configuration
Review the available security settings.
Recommended practices:
- Use HTTPS.
- Use a strong admin password.
- Keep installation files protected.
- Remove the installer after installation.
- Do not share administrator credentials.
- Keep regular database backups.
- Keep the script and server environment updated.
---
18. Installation Step 9 – Final Configuration
Review the configuration before completing the installation.
Verify:
- Website URL
- Website name
- Database connection
- Administrator account
- Email configuration
- Storage directories
- Required permissions
- Security settings
If everything is correct, continue to the final installation step.
---
19. Installation Step 10 – Complete Installation
Once installation has completed successfully, you should see the installation completion message.
At this stage, DO NOT leave the installer accessible on a production website.
---
20. Delete Installation Files
For security reasons, remove:
install.php
and:
/install/
from your server after the installation is complete.
Example:
/public_html/install.php
/public_html/install/
Delete these files/directories only after confirming that the installation has completed successfully.
---
21. Access the Admin Dashboard
After installation, open:
https://example.com/admin/
Or, if installed inside a subfolder:
https://example.com/tools/admin/
Sign in using the administrator credentials created during installation.
---
22. Initial Admin Configuration
After logging in for the first time, configure your website from the admin dashboard.
Recommended order:
- General Website Settings
- Website Logo
- Favicon
- Theme Colors
- Homepage Sections
- Categories
- Tool Listings
- SEO Settings
- Social Login
- SMTP
- Advertisement Settings
- Sponsored Listings
- Blog Settings
- FAQ
- Newsletter
- PWA Settings
- Backup Settings
---
23. Configure Categories
Create categories for your directory.
Examples:
- AI Writing
- AI Image Generation
- AI Video
- AI Audio
- AI Coding
- AI Marketing
- Productivity
- Business
- Design
- Developer Tools
- SEO
- Education
Each category can be configured with available:
- Name
- Icon
- Color
- Banner
- Description
- SEO title
- SEO description
- SEO settings
---
24. Add Your First Tool
From the admin dashboard, open the tool management section.
Create a new tool and provide the relevant information, such as:
- Tool Name
- Description
- Logo/Image
- Category
- Website URL
- Features
- Pros
- Cons
- Use Cases
- Platforms
- Pricing Type
- Tags
- SEO Information
Review the listing before publishing it.
---
25. Tool Submission System
If enabled, visitors can submit their own tools.
Submitted tools can be reviewed and moderated from the admin dashboard.
Recommended workflow:
User submits tool
→ Admin reviews submission
→ Admin edits if required
→ Admin approves/rejects
→ Approved tool becomes publicly available
---
26. Reviews & Ratings
Users can submit reviews and ratings for listed tools.
Administrators can manage submitted reviews through the dashboard.
Recommended moderation workflow:
Review submitted
→ Admin reviews content
→ Approve / reject / moderate
→ Approved review appears publicly
---
27. Favorites & Tool Comparison
Tool Dude supports user engagement features such as:
- Favorites
- Saved tools
- Side-by-side comparisons
The comparison system allows users to compare between:
2–4 tools
This can help visitors evaluate multiple tools from a single page.
---
28. Blog Configuration
Use the built-in blog engine to publish content.
You can create:
- Blog posts
- Blog categories
- Comments
- Comment moderation
- Reported comments
Recommended blog content:
- AI tool reviews
- Software comparisons
- How-to guides
- AI tutorials
- Product updates
- Industry news
- Tool collections
---
29. Configure Advertisement Manager
Tool Dude includes an advertising management system.
Supported advertising options may include:
- Image banners
- Custom HTML
- Custom JavaScript
- Google AdSense
- Sponsored advertising
The system provides 9 advertising placements.
You can configure advertisements from:
Admin Dashboard
→ Ads Manager
Where available, monitor:
- Impressions
- Clicks
- Advertisement status
---
30. Sponsored Listings
You can use sponsored listings to monetize your directory.
Create sponsored listing packages according to your business model.
Possible package options can include:
- Featured listing
- Homepage placement
- Category placement
- Sponsored badge
- Promotional placement
Configure the available options from the administration panel.
---
31. SEO Configuration
Open the SEO settings from the admin dashboard.
Configure:
- Website title
- Meta description
- Meta keywords where applicable
- Open Graph settings
- Social sharing information
- Canonical settings
- Robots settings
- Sitemap
- Schema markup
Tool Dude supports structured data types such as:
- SoftwareApplication
- AggregateRating
- BlogPosting
- BreadcrumbList
- WebSite
Always use accurate information in your SEO fields.
---
32. Sitemap
Tool Dude includes automatic sitemap functionality.
After configuring your website:
- Verify the sitemap URL from the admin panel.
- Open the sitemap in your browser.
- Confirm that it loads correctly.
- Submit the sitemap to Google Search Console.
Make sure your website is publicly accessible before submitting the sitemap.
---
33. Google Search Console
Add your Google Search Console information through the appropriate SEO/settings section.
After verifying ownership of your domain in Google Search Console:
- Open the Sitemap section.
- Add your sitemap URL.
- Submit the sitemap.
- Monitor indexing status.
---
34. Google Analytics
If supported by your configuration, add your Google Analytics measurement information through the relevant settings field.
After saving the configuration:
- Open your website.
- Check the page source if necessary.
- Verify the Analytics tag.
- Confirm traffic in Google Analytics.
---
35. Social Login Configuration
Tool Dude supports social authentication through:
Each provider requires its own application credentials.
Typical configuration includes:
Client ID
Client Secret
Callback URL
Enable only the providers you have correctly configured.
A master social-login switch can be used to enable or disable the overall social login functionality.
---
36. PWA Configuration
Tool Dude includes PWA-ready functionality.
Depending on the hosting and configuration, users can install the website on supported devices.
For best results:
- Use HTTPS.
- Configure the website name.
- Configure the logo/icon.
- Verify the PWA manifest.
- Test installation on supported browsers.
---
37. Theme Customization
Use the theme settings to customize your website.
Available settings may include:
- Primary color
- Secondary color
- Logo
- Favicon
- Custom CSS
- Custom JavaScript
- Dark mode
- Homepage appearance
Always keep a backup before making major customizations.
---
38. Homepage Builder
Use the homepage builder to control available homepage sections.
Depending on the installed configuration, sections can be enabled or disabled according to your website requirements.
Recommended homepage structure:
- Hero Section
- Search
- Featured Tools
- Popular Categories
- Trending Tools
- Sponsored Tools
- Latest Tools
- Blog Posts
- FAQ
- Newsletter
---
39. FAQ Manager
Create frequently asked questions from:
Admin Dashboard
→ FAQ Manager
Add:
- Question
- Answer
- Display order
- Status
The frontend can display FAQs using an accordion-style layout.
---
40. Newsletter
Enable newsletter signup functionality if you want to collect subscribers.
Place newsletter forms in suitable locations such as:
- Homepage
- Blog
- Footer
- Sidebar
Make sure your newsletter collection and email practices comply with applicable privacy and email regulations.
---
41. Database Backup
Use the built-in database backup functionality from the admin panel.
Recommended practice:
- Create backups before major changes.
- Keep regular backups.
- Store important backups outside the public web root when possible.
- Do not expose backup files publicly.
- Download important backups to a secure location.
---
42. Common Installation Problems
Problem: Database Connection Failed
Check:
- Database name
- Database username
- Database password
- Database hostname
- Database user privileges
If your hosting provider does not use "localhost", enter the database host provided by your hosting provider.
---
Problem: 500 Internal Server Error
Possible causes:
- Unsupported PHP version
- Missing PHP extension
- Incorrect permissions
- Incorrect server configuration
- Invalid .htaccess configuration
Check your hosting error logs and verify the PHP requirements.
---
Problem: Images Are Not Uploading
Check:
- /uploads permissions
- PHP upload limits
- PHP post size limits
- Available disk space
- File type restrictions
---
Problem: Pretty URLs Are Not Working
Make sure:
- Apache mod_rewrite is enabled.
- .htaccess is uploaded correctly.
- URL rewriting is supported by your hosting provider.
For Nginx or another server environment, equivalent rewrite configuration may be required.
---
Problem: Emails Are Not Sending
Check:
- SMTP host
- SMTP port
- SMTP username
- SMTP password
- Encryption method
- From email
- DNS/email configuration
Use the built-in test email functionality when available.
---
Problem: Social Login Is Not Working
Check:
- Client ID
- Client Secret
- Callback URL
- Domain configuration
- HTTPS
- Provider application status
The callback URL must exactly match the URL configured inside the corresponding social provider application.
---
43. Security Checklist
After installation, make sure:
[ ] HTTPS is enabled
[ ] install.php has been deleted
[ ] /install directory has been deleted
[ ] Strong admin password is being used
[ ] Database credentials are protected
[ ] Backup files are not publicly accessible
[ ] Required directories have appropriate permissions
[ ] Unused accounts are removed
[ ] Social login credentials are kept private
[ ] SMTP credentials are kept private
[ ] Website and server software are kept updated
---
44. Recommended First-Day Checklist
After completing installation:
[ ] Login to admin dashboard
[ ] Configure website name
[ ] Upload logo
[ ] Upload favicon
[ ] Configure theme
[ ] Create categories
[ ] Add initial tools
[ ] Configure SEO
[ ] Verify sitemap
[ ] Configure Search Console
[ ] Configure Analytics
[ ] Configure SMTP
[ ] Test email
[ ] Configure social login
[ ] Configure advertisements
[ ] Configure sponsored listings
[ ] Configure homepage
[ ] Configure FAQ
[ ] Configure newsletter
[ ] Test reviews
[ ] Test favorites
[ ] Test comparison
[ ] Test tool submission
[ ] Create database backup
[ ] Test website on desktop and mobile
---
45. Final Verification
Before launching your directory publicly, test the following:
Frontend
- Homepage
- Tool listings
- Tool details
- Categories
- Search
- Reviews
- Favorites
- Comparison
- Blog
- Blog comments
- FAQ
- Newsletter
- Login/Register
- Mobile layout
Admin
- Dashboard
- Tools
- Categories
- Users
- Reviews
- Blog
- Comments
- Advertisements
- Sponsored listings
- SEO
- Theme
- SMTP
- Social login
- Homepage builder
- FAQ
- Backups
- Activity logs
Technical
- HTTPS
- Database connection
- Image uploads
- Email delivery
- URL rewriting
- Sitemap
- Schema markup
- PWA functionality
- Mobile responsiveness
---
46. Support
Before requesting support, please provide:
- PHP version
- MySQL/MariaDB version
- Hosting provider
- Exact error message
- Screenshot of the issue if applicable
- Steps that caused the issue
- Relevant browser console/server error information
Do not share:
- Database passwords
- Admin passwords
- SMTP passwords
- API secrets
- OAuth client secrets
---
47. Quick Installation Summary
For experienced users:
- Upload Tool Dude files.
- Create a MySQL/MariaDB database.
- Configure PHP 8.1+.
- Enable required PHP extensions.
- Set required directories to writable permissions.
- Open:
/install.php
- Complete the 10-step installation wizard.
- Create the administrator account.
- Configure SMTP if required.
- Complete installation.
- Delete:
/install.php
/install/
- Open:
/admin/
- Configure your website.
- Add categories and tools.
- Configure SEO and monetization.
- Test the complete website.
- Create a backup.
- Launch your directory.
---
Tool Dude
Build and launch your own AI tools directory, SaaS listing platform, startup showcase, or general website directory with a self-hosted PHP solution designed for standard shared hosting.
No Node.js.
No Composer.
No Laravel.
No complicated build process.
Upload → Install → Configure → Launch.


Be the First Verified Reviewer
Purchase this script to publish your feedback and help independent creators improve.